Photo Window is a software meant to prompt relaxation and positive feelings in a user while he or she is working on a computer.
Photo Window non-intrusively and non-obstructively displays users' pictures, which they can glance at whenever they need a momentary break,
which refreshes them and helps them to regain their focus. Photo Window changes the slides automatically if the user inputs an
"automatic slide change" time period in the Properties window and there are available slides to display.
The slides of Photo Window always display images, although they can also contain videos and documents. Opening the
Viewer allows the user to view the content of the slide - be it an image, a video or a document.
Setting Up Photo Window
- Launch Photo Window.
- Click the Photo Window icon in the Notification Area, and choose the Selection command from the Photo Window menu.
- From the Selection window, choose the source of the slides and specify either an Internet gallery or local items to display, including images, videos and folders containing items to display.
- Use the Properties window to adjust the position, size, and other properties of the slideshow.
- When required, adjust the slideshow position on the screen using the mouse. To amend any other attribute of the slideshow, use the Properties and Selection windows.
- When desired, use the Viewer to enjoy the content of the current slide in amazing detail if it is an image, or play it, if it is a video, and so on.
- Use the Help to learn about the features of Photo Window and make the most of the software.
Examples of the Photo Window slideshow placed in locations of the screen that do not obstruct the work of the user.
Photo Window Help Excerpts
The sections below are excerpts form various Photo Window help articles, which are provided here as supplements to the Setting Up process above.
The information below is not substitute for the Photo Window help system which discusses these and other topics in detail and provides complete information on the subjects.
The Photo Window Menu
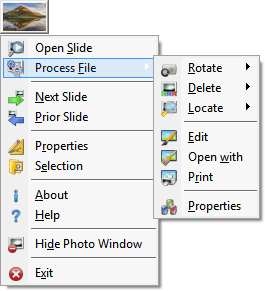
The Photo Window software is controlled via its menu plus any hot keys which have been assigned. The menu is called up
by clicking on the Photo Window icon located in the Notification Area.
Whenever the slideshow is in fade on mouseover operation mode, the Photo Window menu can also be called
by pressing and holding the Ctrl key and clicking the right mouse button on the slideshow.
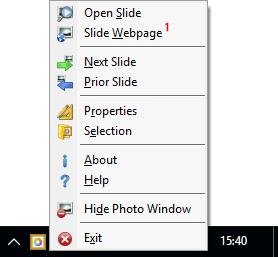
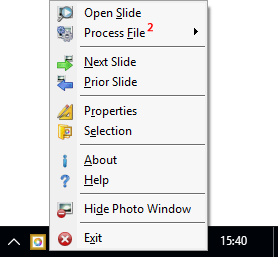
The Photo Window menu in the Notification Area
on online slide
on local slide
The Photo Window context menu
on online slide

on local slide
1 - Menu command - only present for online slides with an assigned webpage.
2 - Sub-menu - only present for local slides.
Changing the Slideshow Position
Moving the Photo Window slideshow to a new location is achieved by dragging it to the desired position on the screen. Depending on the current operation mode, some of
the methods have slight variations.
-
Fade on mouseover, but stay if Ctrl is held down operation modes:
-
Left mouse button: Move the mouse over the Photo Window slide. Before the image has fully disappeared,
press and hold the left mouse button. Photo Window will reverse the transparency
transition of the slideshow, and it will become opaque again. While holding the mouse button down, drag the slideshow
to the desired location on the screen. After the left mouse button is released, the transparency transition will not re-occur until the mouse
moves out of the image area and re-enters the slide. This allows for easy further adjustments by simply dragging the slideshow using the
left mouse button. The normal transparency behavior will be restored after the mouse moves out of the slide.
-
Ctrl key + Left mouse button: Press and hold the Ctrl key and move the mouse over the slideshow image.
Although the mouse is over the image, Photo Window will not hide the slide because the Ctrl key is down. While the
mouse is over the image (with the Ctrl key down), drag the slideshow to the desired position using the left mouse button.
-
Stay on mouseover, but fade if Ctrl is held down operation modes:
-
Left mouse button: Move the mouse over the Photo Window slide and drag it to the new, desired, position.
-
Standard Window operation modes:
-
Left mouse button: Move the mouse over the Photo Window slide and drag it to the new, desired, position.
-
Properties window: Open the Properties window using the Photo Window menu.
Next, using the left mouse button, drag the Slide Display Area
to the desired position for the slideshow on the screen.
Selection
The purpose of the Selection window is to allow the user to specify the source of the slides that will be displayed by the slideshow, slides and other properties.
The source of the slides can be the Internet or the local computer/network. Choosing the Internet as the source of slides requires further selection of the gallery
(category) for slides to be displayed. For example, if the selected gallery is "Nature", the displayed slides will be nature scenes such as flowers, trees, oceans, etc. Choosing
the local computer/network as the source of slides requires further selection of the images, videos, documents, and folders to be displayed by
Photo Window. To open the Selection window choose the "Selection" menu command from the
Photo Window menu, as shown below:
| The Photo Window Selection window with online source of slides |
 |
| The Photo Window Selection window with local source of slides |
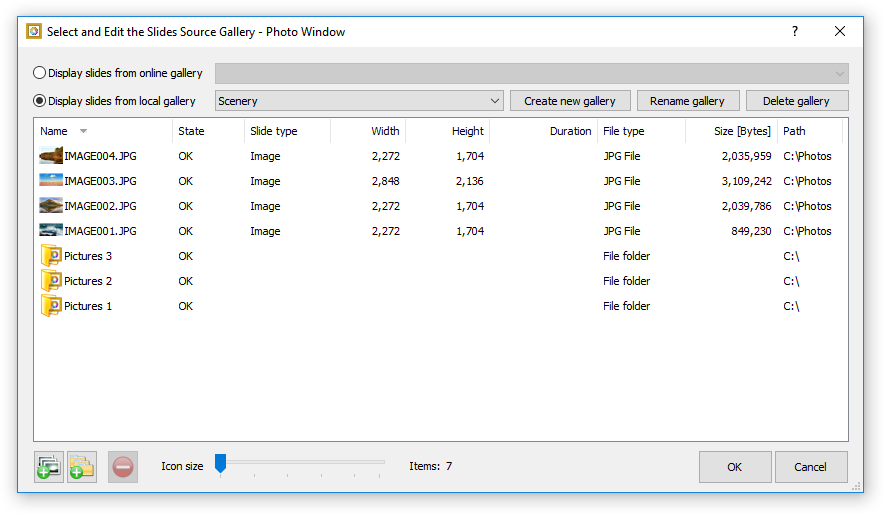 |
Image Source Selection
Properties
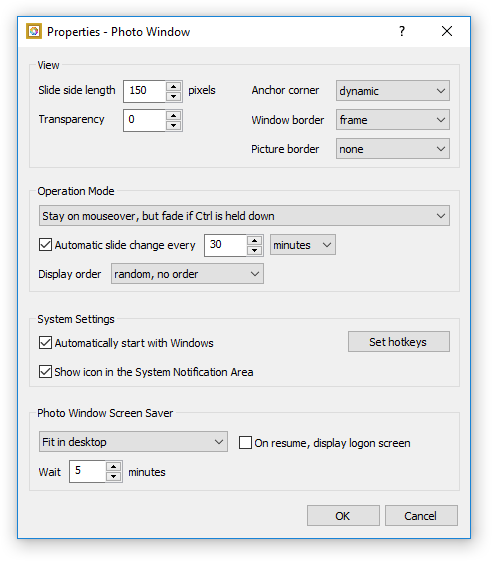
The Photo Window slideshow properties are adjusted using the Properties window, which is examined in this section.
To open the Properties window choose the "Properties" menu command from the Photo Window menu, as shown below:
The Photo Window Properties window
|
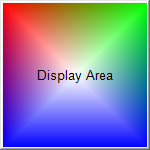
Slide Display Area (SDA)
|
When the Properties window is displayed, the slideshow presents the Slide Display Area (SDA), and hides the slide which would otherwise be displayed in it.
The SDA is the square area wherein the application displays slides, anchoring one of the corners of the current slide with the respective corner of the SDA,
whilst resizing it inside the available space and preserving the ratio of its dimensions. The SDA has a minimum side length of 24 pixels and a maximum side length of 999 pixels.
The SDA is convenient to use to position (drag and drop) and resize the slideshow due to the visual cue it provides.
Note that although images are scaled to fit in the SDA, images with sides less than 18 pixels in length are ignored.
|

|
Operation Mode
| Control |
Description |
| Operation Mode |
- Photo Window has six modes of operation: |
| Stay on mouseover, but fade if Ctrl is held down |
- Photo Window is always visible (when running), including on mouseover. Press and hold the Ctrl key down to make Photo Window fade while the mouse is over it. |
| Fade on mouseover, but stay if Ctrl is held down |
- Photo Window is always visible (when running), but fades on mouseover. Press and hold the Ctrl key down to suppress the fade. |
| Scheduled operation, stay on mouseover |
- Photo Window is visible/hidden for scheduled periods of time. While in a visible period, the slideshow remains visible on mouseover, unless the Ctrl key is pressed. |
| Scheduled operation, fade on mouseover |
- Photo Window is visible/hidden for scheduled periods of time. While in a visible period, the slideshow temporarily fades on mouseover, unless the Ctrl key is pressed. |
| Standard window with a taskbar button |
- The Photo Window window is an ordinary window which can be covered by other ordinary windows and has a button on the taskbar. |
| Standard window without a taskbar button |
- The Photo Window window is an ordinary window which can be covered by other ordinary windows and does not have a button on the taskbar.
Click on the Photo Window icon in the Notification Area to bring its window to the foreground.
|
The Photo Window viewer
The Photo Window viewer is a window that is designed and used for viewing the content of the current slide.
Depending on the content of the slide, the Viewer displays images with remarkable zoom capacity, plays videos, or shows documents.
-
Hot key: Press the modifiers and the hot key assigned to the Open/Close slide command. Hot keys are managed using the Select Hot Keys window.
-
Right mouse button: Move the mouse over the Photo Window slideshow. Before the image has fully disappeared, click the
right mouse button. Photo Window will reverse the transparency transition of the slideshow, which will become opaque and show
the Viewer centered in the monitor of the call.
-
Photo Window menu: The Photo Window menu can be called in two ways:
-
Click the Photo Window icon in the Notification Area to open the Photo Window menu, then
select Open Slide from the menu, as shown:
-
Press and hold the Ctrl key, and click the slide with the right mouse button
to display the Photo Window context menu. Select the Open Slide command from the menu, as shown:
Note: using this method when the software operates in one of the "fade if Ctrl is held down" operation modes is possible only while the slide is in the process of fading away.
Note that the Viewer is always shown in the screen where the mouse pointer was located when the Viewer was called (a system may have one or more monitors attached to it).
Download and install the Photo Window software and review the its help for more details.
|