Navigate to Target - Navigate to Previously Appointed Files and Folders From Anywhere in Windows Explorer or From The Notification Area.

Act On File Windows Compatibility Seals
 
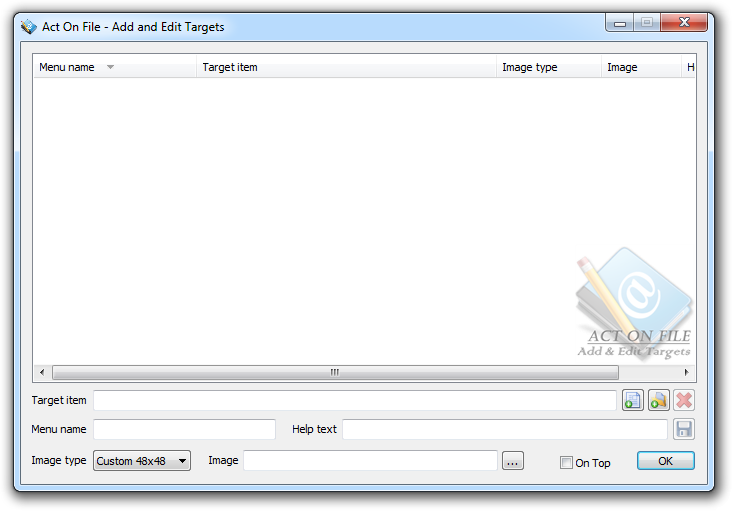
Add and Edit Targets window
 

This section discusses the Navigate to Target functionality of the Locator module.
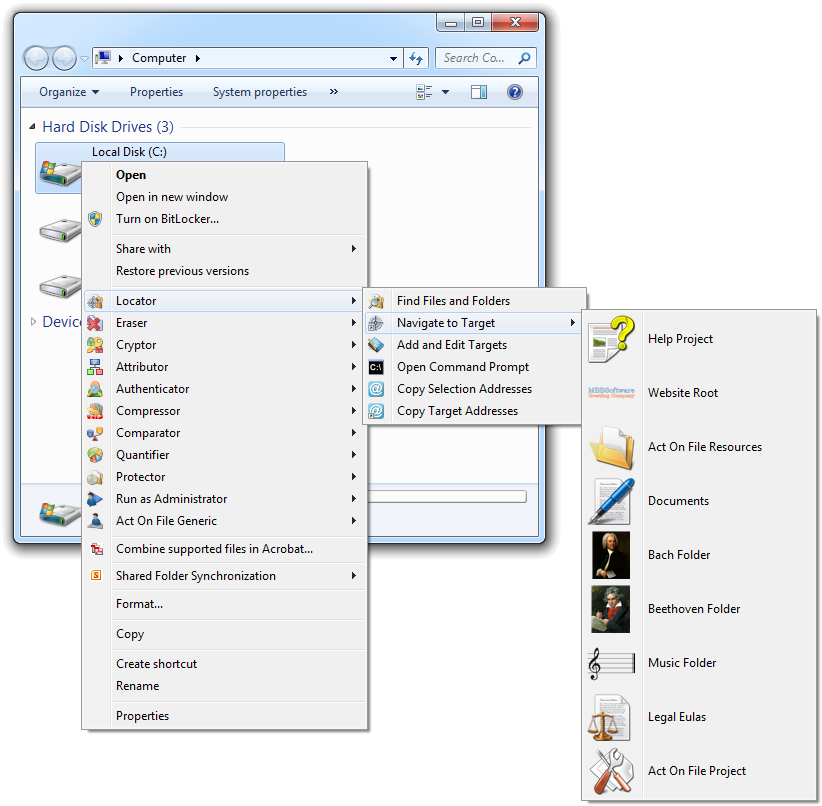
The Navigate to Target functionality is used to locate previously appointed files and folders in a very fast fashion without having to browse in Windows Explorer. Typically, all users have some files and folders to which they regularly navigate. If it takes 10 seconds to navigate to such a location (and it normally takes longer) and if we navigate to these items 5 times per hour (we normally navigate more often than this), we waste 50 second every hour). In a 7.5 hour work day, this is 6.25 minutes, or 31.25 minutes per working (5 day) week. In a 4.5 week working month, that is 2.3 wasted hours, and about THREE AND A HALF WORKING DAYS PER YEAR. The Navigate to Target functionality of the Locator module ensures that such wasted time can be kept to an absolute minimum. Many users create shortcuts on their desktop trying to minimize the problem; however Act On File gives a truly elegant solution. The Navigate to Target functionality can be invoked from the Act On File icon on the Notification Area (System Tray), or from anywhere in Windows Explorer where the Act On File context menu is available. In addition, the Navigate to Target functionality allows the user to add a name to each item, use the default target icon or select an image of their choice, and add a help sentence to each item displayed in the status area of Windows Explorer. Since visual recognition is much faster and easier, it is advisable that one uses an appropriate image of their choice to denote each particular target. There are a wide range of image galleries available on the internet from where one can quickly find beautiful and expressive images that would be ideal for any kind of target object. Be sure to comply with the license terms of any material, obtained from the internet or any other source.
Capture: Navigate to Target
Navigate to Target
Capture: Add and Edit Targets
Navigate to Target Add and Edit

Operation

Select the target file or folder in the Target Items field. Enter the menu entry name, add help text to remind you about the item, select an image type and if necessary, point to the image which will be displayed in the Navigate to Target menu. When all fields are suitably filled, click the save icon. Now the target is registered and will appear in the Navigate to Target menu. To navigate to an item simply invoke the Act On File context menu by clicking on any file, folder or drive in Windows Explorer or on the Act On File icon in the Notification Area (System Tray) and then select the required target entry in the Navigate to Target submenu.

Controls

  
Selection Controls
Navigate to Target Add and Edit Selection Controls
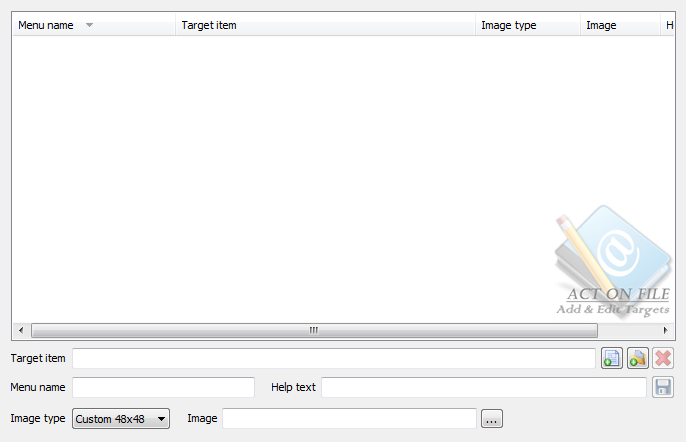
These controls are used to select, display and edit the selected/appointed targets. To add a new target, enter/paste/drag and drop it to the Target Items text field. To edit a target item, double click it in the view control. This will cause its properties to be distributed in the respective controls where they can be edited and finally saved by clicking on the Save button. All standard keyboard, clipboard and drag and drop operations work in an appropriate manner.
Target ItemEnter the path to a new target item: you can type, paste, drag and drop the item or use the Select File and Folders buttons. To edit an existing item path: select the item in the view control, edit the path and save the changes. Target Item entries must be unique.
Navigate To Target Add and Edit Select FileSelect File
Open a Select File dialog to appoint a target file whose path will be placed in the target item textbox.
Navigate To Target Add and Edit Select FolderSelect Folder
Open a Select Folder dialog to appoint a target folder whose path will be placed in the target item textbox.
Navigate To Target Add and Edit Delete ItemsDelete Items
Unregister the selected target items and remove them from the targets view.
Menu NameEnter a name (text) for the target in the Navigate to Target submenu.
Help TextEnter a short piece of help text to remind you about the target. This text is displayed in the Windows Explorer status area when the item in the Navigate to Target submenu is highlighted, but not yet selected.
Image TypeSelect the source and the size of the image which will be displayed in the target entry in the Navigate to Target submenu.
System 16x16Use the 16x16 pixels system default icon for the target file or folder.
System 24x24Use the 24x24 pixels system default icon for the target file or folder.
System 32x32Use the 32x32 pixels system default icon for the target file or folder.
System 48x48Use the 48x48 pixels system default icon for the target file or folder.
Custom 16x16Use a scaled-to-fit image in a 16x16 pixel area derived from a user selected image.
Custom 24x24Use a scaled-to-fit image in a 24x24 pixel area derived from a user selected image.
Custom 32x32Use a scaled-to-fit image in a 32x32 pixel area derived from a user selected image.
Custom 48x48Use a scaled-to-fit image in a 48x48 pixel area derived from a user selected image.
Navigate To Target Add and Edit SaveSave
Save the new target or save the changes of an existing target if changes have been applied to it.
Window Controls
Navigate To Target Add and Edit Window Controls
These controls have generic meanings.
On TopSets and clears the Always On Top flag on the window. This checkbox adds or removes the window from the group of Top-most windows.
OKCloses the window.